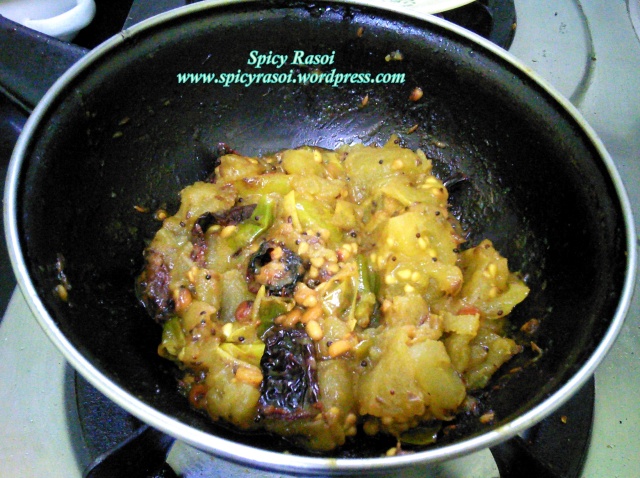
Stuffed Ridge gourd Curry/ Guthi Berakaya Kura/ Nethi Beerakaya Kura

Ridge gourd known as Beerakaya (telugu) or Turai (hindi) or Luffa (in other countries) is a dark green vegetable which is rough on outside with white fibrous pulp inside. Another kind of Ridge gourd is Sponge Gourd or Silk Squash called Nethi Beerayakaya (telugu) which has similar texture inside but a smoother texture outside. It contains abundant dietary fiber, vitamin C, riboflavin, zinc, thiamine, iron, magnesium and manganese.

It is highly recommended by health experts and doctors for its medicinal properties. Ridge gourd is good for stomach and effective in reducing constipation, purifies blood, cures jaundice, beneficial for diabetics due to the existence of insulin,  aids weight loss due to its low saturated fat content, possesses anti-inflammatory and anti-biotic properties, strengthens  immune system, excellent for skin care  and is utilized in making loofah sponge which is used as a body scrub. Ridge gourd is abundantly used in Indian cooking for making curry, dal or sambhar.

I love stuffed curries – be it brinjal, capsicum, tindora, bendi… and they are a big hit at my house!! Usually Ridge gourd is not something that many enjoy or love due it its soft watery texture. So if you are looking for a different variety for any special occasion with Ridge gourd, go for this recipe. You can either use this recipe to make stuffed-curry with either the regular Ridge gourd or Sponge gourd. It goes well with both rice or rotis.

Ingredients:

For Stuffing:

Peanuts – 3-4 tbsp

Sesame seeds – 3 tbsp

Dry coconut (grated/pieces) – 2 tbsp

Dhania – 3 tbsp

Dry Red chilli – 5-6 No

Turmeric – 1 tsp

Salt – 2 tsp

For curry:

Ridge-gourd – 2 No’s

Curry Leaves – 1 sprig

Coriander – handful (finely chopped)

Oil – 3 tbsp

Mustard seeds – 2 tsp

Jeera – 2 tsp

Method:

  1. Dry Roast peanuts, sesame seeds, dry coconut, dry chillies separately and let it cool.
  2. Transfer into a grinder, add salt and turmeric and grind into a coarse powder.
  3. Peel the Ridge-gourd and cut into 3-4 inch long pieces.
  4. Take each piece, make a slit carefully on one side upto 3/4th depth without cutting through the other side.
  5. Now fill the slits with the stuffing generously.
  6. Keep rest of the stuffing aside, which will be used as a gravy for the curry.
  7. Heat a wide pan and add oil to it.
  8. Once the oil is hot, add mustard, jeera, curry leaves and coriander.
  9. Now place all the stuffed ridge-gourd pieces carefully into the pan with the stuffing side on top.
  10. Cover the pan with a lid and cook on low-medium flame for 6-8 mins.
  11. Now, you can gently turn all the pieces and cover the pan again to let the other sides of vegetable cook for another 4-5 mins.
  12. Next add rest of stuffing powder and give a gentle mix. Cook for another 4-5 mins till all the water evaporates.
  13. Garnish with coriander and serve hot.

Cooking Tips:

  1. Check the Ridge gourd taste before cooking. Sometimes they are very bitter and cannot be used fro cooking.
  2. Same stuffing can be used to make stuffed brinjal (vankaya) or stuffed tindora (dondakaya).
  3. If you want the curry to be dry, do not use the lid, instead cook on medium-high flame and keep turning the pieces every 2-3 minutes.

Mixed-Dal Dosa batter/ Adai Dosa batter (no fermentation)

I feel one of the best food legacies our ancestors have left behind for us is our humble “DOSA”. Its easy, its healthy, its yummy, there are so many varieties and its a complete meal by itself.

I keep changing my Dosa ingredients every time so that we include the goodness of all our super grains and pulses. This particular recipe is an enhanced version of Adai Dosa from down south. I use a mix of 4 dals, millets, rice and this batter does not need any fermentation. All you have to do is soak the ingredients for 6-8 hours, wash, grind and use the batter for making our yummy dosas.

Unlike the regular urad dal and rice dosa batter which is high in carbs, , this mixed-dal dosa batter is a good option if you want to cut carbs and include more protein and fibre in your meal. It not only tastes as good as the regular dosa, but also keeps you fuller for a longer time.

Ingredients for the batter:

Basic Ratio of Dal : Rice+Millets = 2: 1

Urad Dal – 1 cup

Chana Dal – 1/2 cup

Tool Dal – 3/4 cup

Green Moong – 3/4 cup (optionally use yellow moong dal)

Millets – 1 cup (any kind, I have used kodo millet)

Rice – 1/2 cup

Methi seeds – 3 tbsp

Note: Based on your requirement vary the size of cup. I have used a 200 ml size cup, and this yields about 1.5 kg of batter which serves for 5 people for 2 times. If you do not have the mentioned dals, use whichever dals you have in 2:1 ratio of Dal and Rice/ Millets.

Method:

  1. Mix all the ingredients together and wash 2-3 times .
  2. Soak in double the quantity of water for 6-8 hours.
  3. Rinse the soaked grains with fresh water and grind into a smooth paste by adding water as required.
  4. Add 1 tbsp of salt and 1 tsp of jeera powder, and pinch of hing for a nice flavor.
  5. Add water to form a pouring consistency similar to regular dosa batter.
  6. The batter can be stored in the fridge in an airtight contained upto a week.

Making the Dosa:

  1. Heat a dosa pan on the stove and smear a layer of oil once it is hot. Optionally, you can cut an onion and rub it on the pan, so that the batter does not stick to the pan.
  2. Pour the batter on the hot pan, and spread into a thin layer with the help of a laddle.
  3. Add oil as required and roast it well. Once it is well cooked, flip it onto the other side and roast for a minute.
  4. Serve hot with your favorite chutney.

Cooking Tips:

  1. Add water as per your preference of dosa thickness. If you prefer a thicker dosa, add lesser water.
  2. You can also make chilla or uttapam with this batter by adding a lot of vegetables.
  3. If you do not have the mentioned dals, use whichever dals you have in 2:1 ratio of Dal and Rice/Millets.
  4. Since the batter is not fermented, it may slightly change color after a couple of days which is normal and good to use as long as there is no sour smell.
  5. Do not store for more than 1 week as the batter will get sour.

Vegetable Sprout Salad

Preparation time: 20 mins

Cooking time: 15 mins

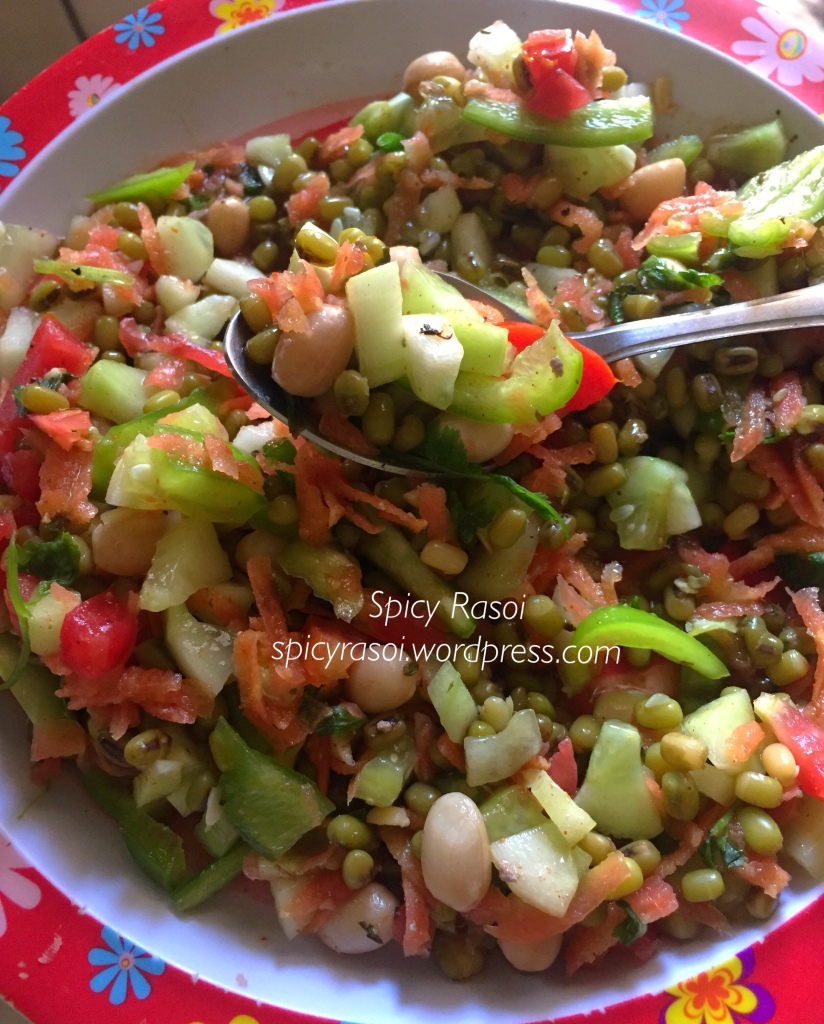
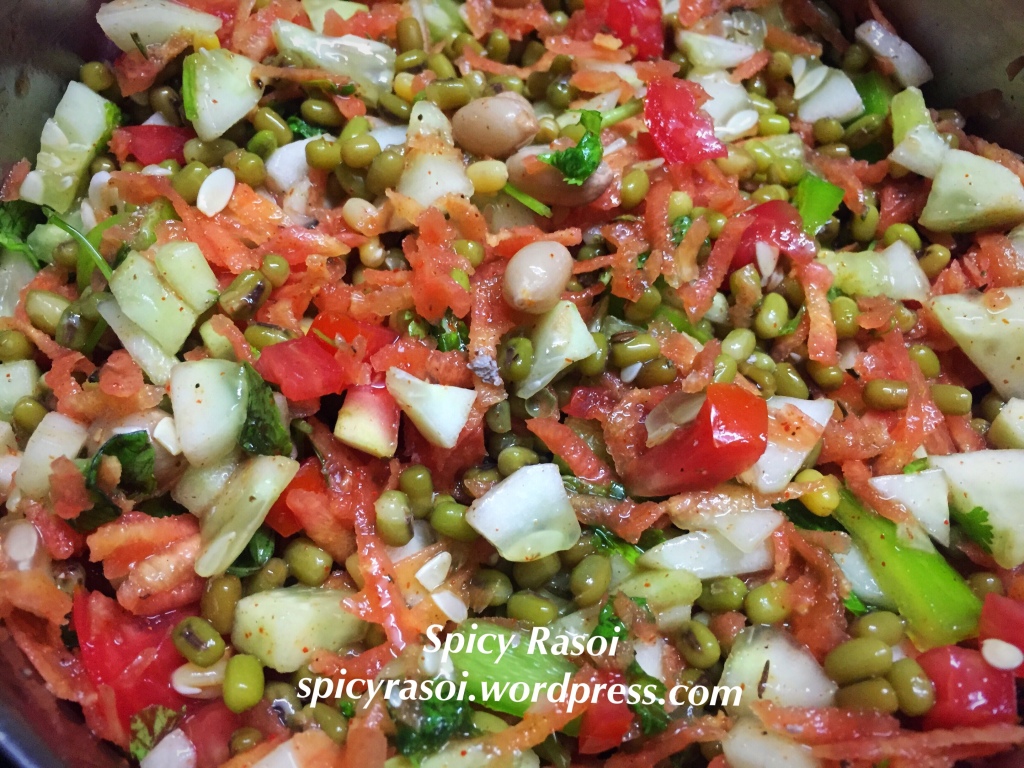
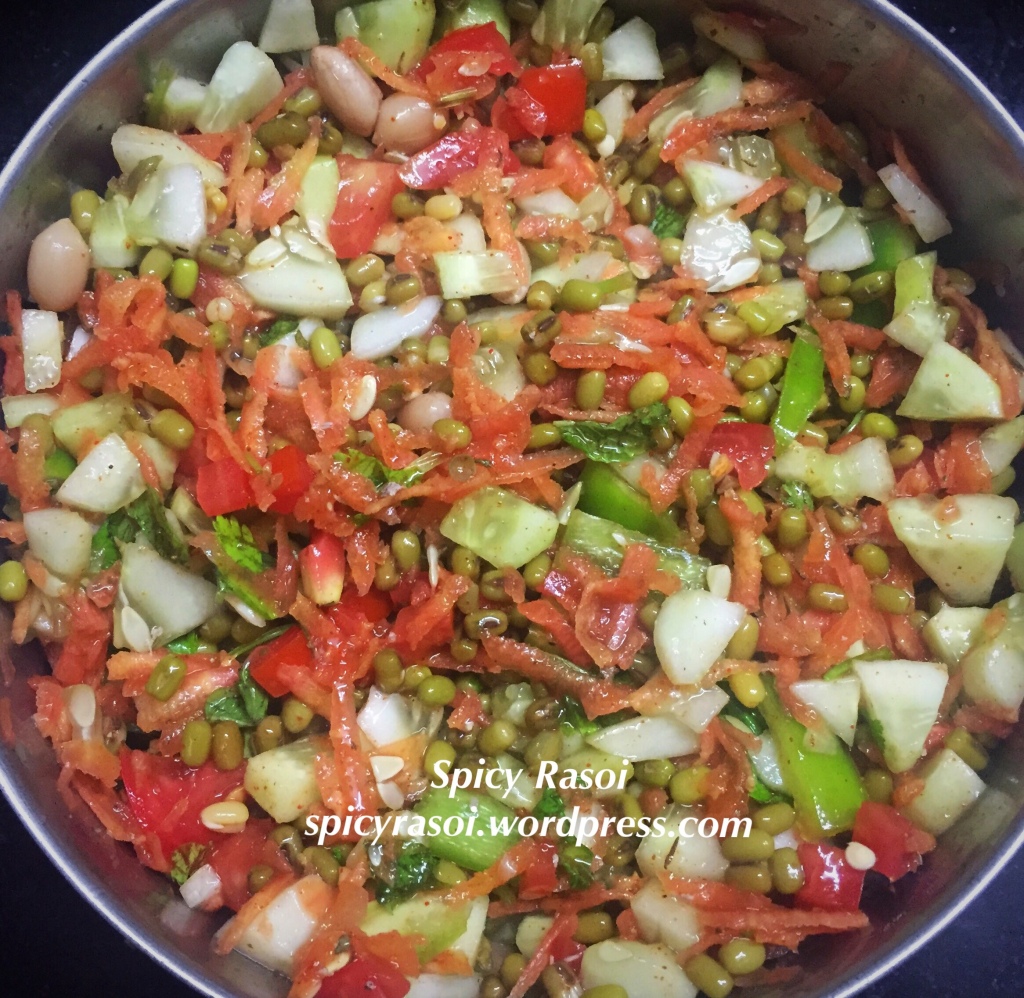
There’s nothing like a fresh bowl of salad… be it for breakfast, lunch or dinner. And the way I like is with lots of crunch and a dash of spices. Over the years, this recipe is my go to salad recipe and it has become a Monday breakfast ritual at out home to help our body cope with all the weekend indulgence.

I like to use different flavors each time to make it interesting. I suggest you use some spice mix like Italian seasoning, Mediterranean spice mix , chilli sauce to give it that extra zing.

Ingredients:

Moong sprouts – 1 cup (soaked overnight)

Raw peanuts- 2 tbsp soaked overnight

Cucumber – 1 big, peeled and cut into small cubes

Carrot – 2 No’s, peeled and grated

Tomato – 2 No’s, deseeded and cut into small cubes

Capsicum – 1 big, deseeded and cut into thin, 2 inch long pieces

For Seasoning:

Salt – 1 tsp (vary as per taste)

Chilli flakes – 1tsp (vary as per taste)

Chaat Masala – 1/2 tsp

Italian Seasoning – 1/2 tsp

Chilli sauce – 1 tsp (any brand)

Mint – shredded or chopped for garnishing

Coriander – shredded or chopped for garnishing

Lemon juice – 1-2 tbsp as per taste

Optional Ingredients for crunch

Pumpkin seeds or Watermelon seeds – 2 tbsp

Chopped/Shredded almonds – 1 tbsp

Method:

1. Boil the soaked Moong sprouts and peanuts in a pan or in a microwave for 5-8 mins. Drain all the excess water and set aside to cool.

2. Chop all the vegetables and add to a mixing bowl.

3. Next, add the boiled Moong sprouts, peanuts, and seasoning ingredients and give a good mix.

4. Once you place the salad into serving plates, sprinkle the optional ingredients for an extra crunch and serve.

Cooking Tips:

  1. Use firm vegetables to get avoid a soggy looking salad
  2. If you see excess water in cucumbers and tomatoes, squeeze out the extra water.
  3. If you have well sprouted Moong beans, use them directly and do not boil them as the essential nutrients will be lost.

Poha / Atukula upma / Avlakki oggarne

Prep time : 5 mins

Cooking time: 10 mins

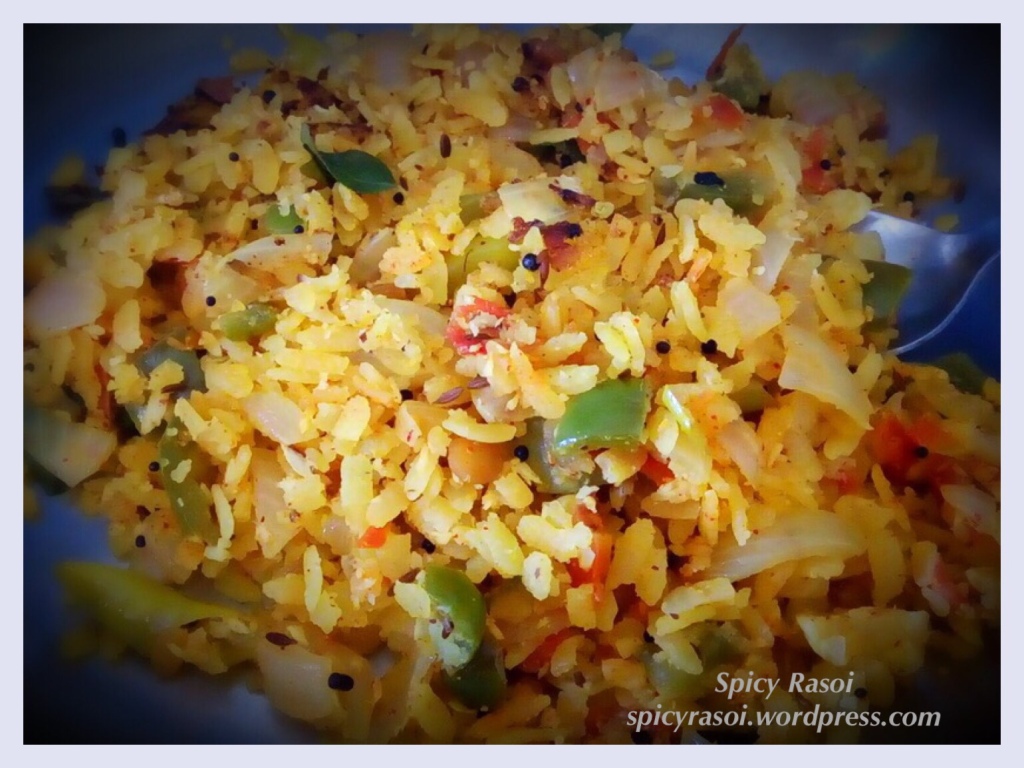
Originally from Maharashtra, Poha has become a staple breakfast everywhere. Made with vegetables and thick flattened rice called Atukulu (telugu) or Avlakki (kannada) and poha everywhere else, its a complete meal which contains carbs, fibre, protein and vitamins.

Being a derivative of rice, its easy on the stomach and considered as a bhog item which can be consumed during Ekadashi fasting in many cultures (without onion).

This is also an on-the-go breakfast option on busy days as it hardly takes 15 mins to make Poha. I would highly recommend beginners who do not have any cooking experience to start with Poha, you can never go wrong here!!!

Ingredients:

Thick poha – 2 cups

Onion – 1, chopped finely

Capsicum – 1, chopped finely

Carrot – 1, chopped finely

Potato – 1, cut into small cubes

Boiled green peas – 2 tbsp (optional)

Green chilli – 3, slit lengthwise

Curry leaves – 2 sprigs

Peanuts – 2 tbsp

Oil- 2 tbsp

Mustard seeds – 2 tsp

Chana dal – 1tsp

Urad dal – 1 tsp

Turmeric – 1tsp

Salt – 2 tsp

Lemon – 1

Coriander – for garnishing

Method:

1. Heat a pan and add oil to it.

2. Once the oil is hot, add peanuts and roast till they turn a little dark.

3. Now add mustard seeds, chana dal, urad dal.

4. Next add curry leaves, green chillies and onions and stir till onion turn golden.

5. Add potato, capsicum, carrot, 1tsp salt and stir. Cover the pan and let this cook on medium flame for 10 mins till all the vegetables become soft.

6. Meanwhile, rinse the poha twice with clean water and discard the water.

7. Soak the poha in water for 5 mins.

8. Then, take a handful of soaked poha each time, squeeze out all the excess water and tranfer into a bowl.

9. Add 1 tsp salt, lemon juice to this washed poha and let it rest for 2 mins.

10. Once the vegetables are cooked, transfer the washed poha into the pan and mix well.

11. Let it cook for 1-2 mins. Switch off the stove and garnish with fresh coriander leaves.

12. Sprinkle mixture or bhujia on the poha and serve hot.

Cooking Notes:

1. To check it poha is soft enough, if you press a grain, it should crush or mash easily.

2. If the poha looks too dry after adding to the pan, sprinkle some water and for a minute or two.

3. Optionally you can also add fresh grated coconut to the poha just before garnishing.

Mango Ice-cream

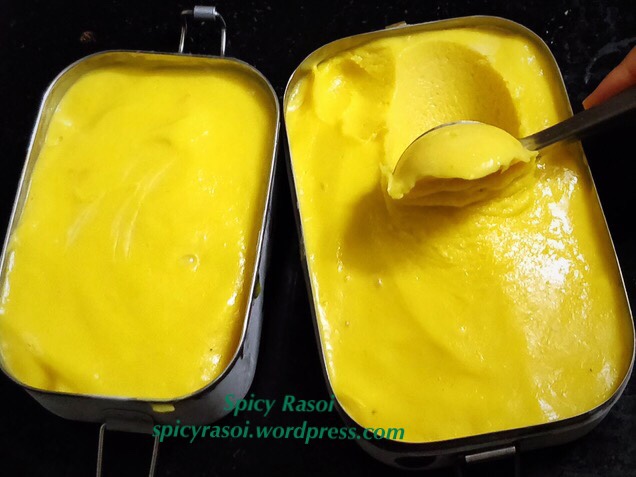
Nothing beats the taste of fresh Mango Ice-cream and if you try this home-made mango ice-cream… trust me, you will get addicted to it!!

Summer’s here, so is our favorite fruit…Mango!!! Did you know that Mangoes are known to reduce stress, produce happiness hormones and improve over all mental well being. So relish them without guilt and add them to all your meals including desserts while the season lasts!!

Ingredients:

Ripe Mango – 2-3 medium size (preferably alphonso or badami which have a nice flavour)

Condensed milk – 1/2 cup

Sugar – 1/2 cup (vary as per sweetness in mango)

Milk – 1 1/2 cup

Lemon juice – 1 tsp

Method:

  1. Peel and chop the mangoes which measure to 1 1/2 cup
  2. Grind the sugar to a powder
  3. Boil and cool the milk
  4. Now, blend the mangoes and sugar into smooth paste.
  5. Transfer this into a bowl, add condensed milk, milk, lemon juice and whisk until everything mixes into uniform mixture.
  6. Pour this mixture into a shallow steel or plastic container with a lid and freeze for 6-8 hours.
  7. Once it is semi set, again transfer into a mixer and blend. This gives a smooth creamy texture to the ice-cream.
  8. Transfer back into the container, cover the lid and freeze for 10-12 hrs until it sets.
  9. Scoop into a serving bowl, garnish with small pieces of mango and enjoy!

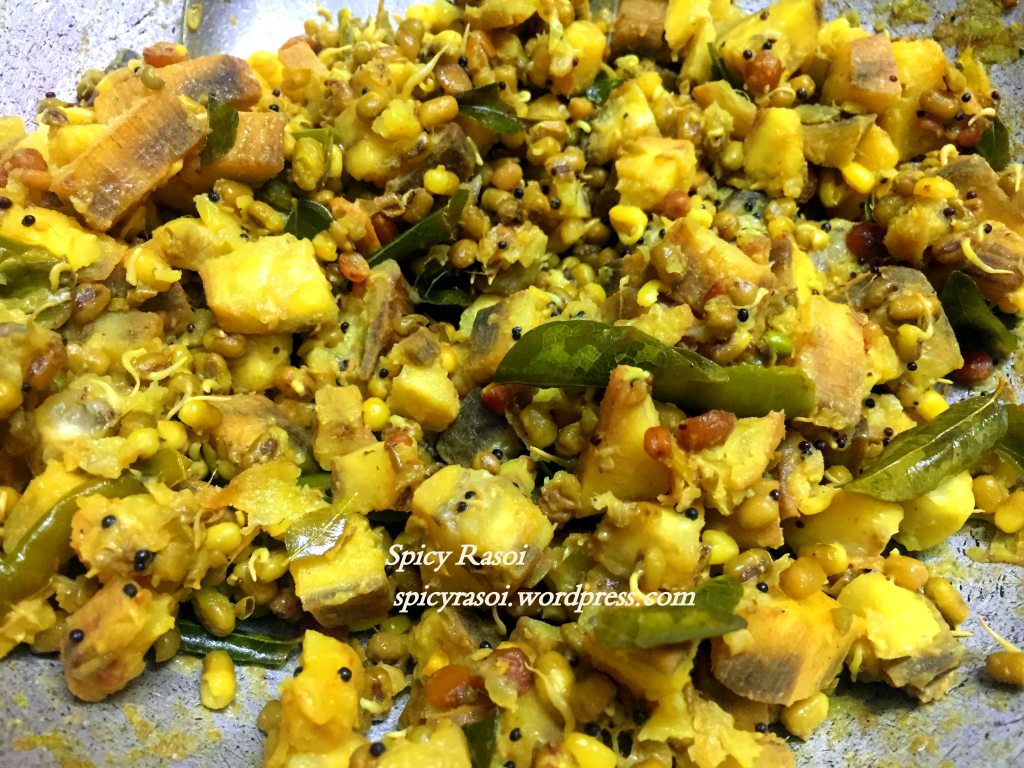
Raw Banana with sprouts curry /Aratikaya pesala Kura

Health Benefits of Raw Banana

Raw banana is considered as a superfood with many health benefits. Raw bananas contain high amounts of sodium, potassium, dietary fibre, protein, vitamins and minerals which are great for the overall health of the body. 1 raw banana contains 81 calories, which makes it a very diet-friendly vegetable. 

In addition to the above, adding raw bananas to your diet will improve your colon health, boosts metabolism, controls diabetes, and the high level of starch help in regulating the blood sugar levels of the body and in strengthening the digestive system.

In South India, Raw banana is used as one of the staple vegetables due to its abundant availability. This particular recipe using Raw banana is a very simple, low oil, high protein recipe which can be used as a side dish for rice or rotis. I highly recommend trying this on kids, as you can sneak in all those sprouts which they don’t usually prefer eating raw!!

Preparation time: 10 mins

Cooking Time: 15-20 mins

Ingredients:

Raw Banana – 3 Nos

Moong sprouts – 3-4 tbsp

Green Chilli – 3 Nos

Curry leaves – 1 sprig

Mustard seeds – 1 tsp

Chana dal – 1 tsp

Urad dal -1 tsp

Turmeric – ½ tsp

Salt – 1 ½ tsp

Lemon – ½

Coriander- for garnishing

Method:

  1. Wash and peel the raw bananas. Cut into cubes and drop them into a bowl of water mixed  with a 1 tsp of turmeric to avoid blackening (oxidation) of the raw banana.
  2. Slit the green chillies into long pieces.
  3. Heat oil in a pan, add mustard seeds and let them splutter. Then add chanadal, urad dal, turmeric, chillies and curry leaves.
  4. Once the dal turns golden, add the raw banana cubes and give mix well.
  5. Next add the sprouts, salt and mix again.
  6. Now, add ½ cup of water, close the pan with a lid.
  7. Cook on low to medium flame for 5-10 mins till the banana looks nicely cooked.
  8. If you mix too much or pour too much water, it will become mushy.
  9. Once it is well cooked, remove the lid, give a good mix and keep the stove on medium flame till any excess moisture dries out. You can also add another tbsp of oil and cook on high flame for 2-3 mins to give it a slight crunch.
  10. After you turn off the stove, squeeze ½ a lemon, garnish with coriander and transfer the curry into a serving bowl.

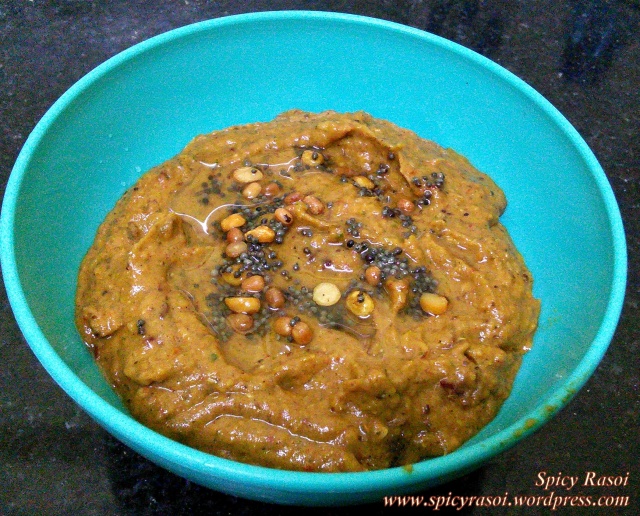
Green Tomato Chutney

Andhra cuisine is well known for its variety of chutneys and pickles. Raw tomato chutney is one such quick chutney made with a handful of ingredients and goes very well with rice, roti and dosa. It is quite surprising to know that green tomatoes are healthier and better than red ripe tomatoes. They are rich in anti-oxidants, vitamin-A, B,C and  iron. I think I am going to use them more often from now on 🙂 🙂

IMG_20140222_141912

Ingredients:

Green Tomato – 3 No’s  (chopped into big chunks)

Green chilli – 2 No’s

Red chilli – 2 No’s

Tamarind – 1 tsp

Mustard seeds – 1/2 tsp

Jeera – 1/2 tsp

Urad Dal – 1/2 tsp

Chana Dal – 1/2 tsp

Sesame seeds – 1/2 tbsp

Methi seeds – 4-5 grains

Oil – 2 tbsp

Turmeric – 1/2 tsp

Salt – 1  1/2 tsp

IMG_20140222_120631

Seasoning:

Oil – 1 tbsp

Mustard Seeds – 1/4 tsp

Urad dal – 1/4 tsp

Chana dal – 1/4 tsp

Hing – pinch

Method:

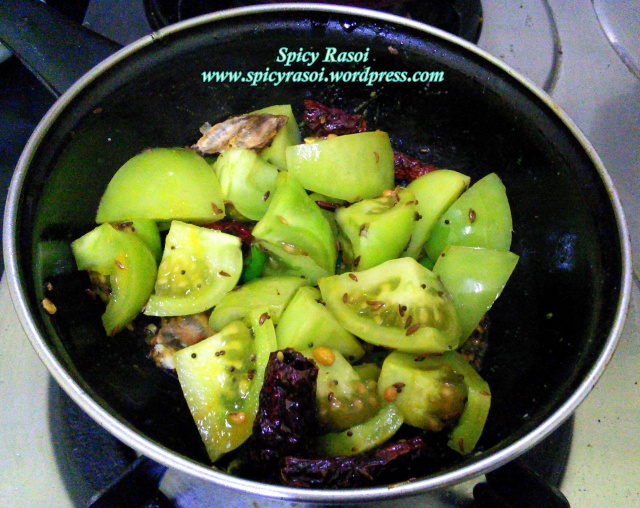
1. Heat 2 tbsp oil in a pan. Add mustard seeds, jeera, chana dal, urad dal, sesame seeds, red chilli, green chillies and fry for a minute.

2. Next add the tomatoes, tamarind, turmeric, salt and mix. Cover and cook for 10 mins till the tomatoes become soft.

IMG_20140222_130820

3. Remove the lid and cook for another 3-4 mins till all the moisture evaporates.
IMG_20140222_132455

4. Once it cools,  grind it into a  smooth paste and transfer the chutney into a bowl.

5. For the seasoning, add 1 tbsp oil in a pan and all the seasoning ingredients. Once the dals turn slightly brown, pour the seasoning on the chutney and mix well.

6. Serve with hot rice, roti or dosa.

Corn Pakora

Preparation time – 15 mins

Cooking time – 20 mins

IMG_6309

Corn Pakora or Corn Vada is an ideal snack when you are in mood for some crispy and crunchy hot fritters. These yummy pakoras go well with your evening cup of chai. These pakoras can be made with regular corn or sweet corn….. I prefer sweet corn as it is tastier !!

Ingredients:

Sweet corn – 1 cup

Ginger – 1/2 inch

Green chilli – 1 or 2

Jeera powder – 1 tsp

Ajwain – 1/2 tsp

Rice flour – 1 tbsp

Corn flour – 1 tbsp

Onion – 1 (finely chopped)

Coriander leaves – 1 tbsp (finely chopped)

Salt – 1/2 tsp

Oil – for deep frying

Method:

1. Boil the sweet corn kernels till they are soft. If you are using frozen corn, defrost in a microwave.

2. Next grind the corn along with ginger, chillies and jeera powder into a coarse paste.

3. Transfer this paste into a mixing bowl. Add rest of ingredients and mix well to form a thick batter.

4. Make lemon size balls and flatten into patties between your palms.

5. Heat oil in a pan for deep frying. Slowly drop the patties and fry on medium flame till both sides turn golden brown.

6. Sprinkle some chaat masala and serve hot with tomato ketchup or green chutney.

IMG_6311

Veg Minestrone Soup

image

Monsoons are here, and nothing is as good as a bowl of steaming hot soup on a rainy day. I love soups and can have them any time of the day. If you have the right vegetables and few spices in hand, you can never go wrong in making delicious soups. Minestrone soup has been my favorite from the time I first tasted it at a fancy Italian restaurant. Though it needs some prior preparation, no soup is as healthy, nutritious and filling as this. Serve with few slices of garlic bread on the side and it can be as filling as a wholesome meal!

Ingredients:

Boiled vegetables – 1 bowl (Potato, Carrot , Cauliflower, Sweet corn) vary veggies as per taste
Capsicum – 1/2
Boiled kidney beans – 1/2 cup
Macaroni pasta – 2 tbsp
Tomatoes – 2
Tomato ketchup – 2 tbsp
Olive oil – 1 tsp
Pepper powder – 1 tsp
Oregano – 1/2 tsp
Salt – 1 tsp
Chilli flakes – as per taste

Method:

1. Soak kidney beans overnight. Pressure cook for 2-3 whistles till they turn soft.  (Alternatively, use canned beans)
2. Chop all vegetables into small cubes. In a saucepan, boil potato, carrot, cauliflower and sweet corn in 4 -5 cups of water till they turn soft. Drain the water into a bowl which can be used as vegetable stock for making the soup.

3.  Cook the macaroni pasta till it turns soft and set aside.
4. Boil 2 whole tomatoes for 2 mins and puree them in a mixer. (Alternatively use store bought tomato puree)
5. In a pan, heat olive oil. Add basil leaves, finely chopped capsicum and fry for 1 minute. Next add the tomato puree and cook for 2 mins.
6. Now add the boiled vegetables, boiled beans and vegetable stock.

7. Next add tomato ketchup, salt, pepper and oregano and mix well. Add the cooked macaroni pasta and let the soup boil for 5 mins.
8. Sprinkle chilli flakes and serve hot!


Vegetable Pizza

IMG_6194

We have totally stopped ordering pizza’s from the day I made my first pizza. Until then I didn’t know pizza making was so simple and so much fun. The best part about making your own pizza is you get to experiment with a variety of toppings and crusts… I love my pizza with very light cheese, wheat crust and lots of toppings. So bid goodbye to expensive pizza chains and try out this recipe for a perfect medium crust pizza…

Yield: 2 medium size pizzas

INGREDIENTS:

Pizza base:

All purpose flour (Maida) – 1 ½ cup

Wheat Flour – 1 ½   (alternatively, you can use 3 cups of maida)

Salt – 1 tsp

Sugar – 1 tbsp

Olive oil – 2-3 Tbsp

Dry Yeast – 1 ½

Water   (as required for making the dough)

Pizza toppings

Pizza sauce – 2 tbsp  (I used Maggi Pizza sauce)

Vegetable Toppings : (Chop all the vegetables into thin long slices)

Onion – ½

Green Capsicum – ½

Yellow/Red Capsicum – ½

Tomato – ½

Green chilli – 1 (cut into thin rings)

Mozzarella Cheese or Pizza cheese – as required (grated)

Herbs – Oregano, Parsley, Chilli flakes (as per taste)

 Method for making the base:

1. Add sugar to 1 cup of warm water and mix. Add the dry yeast granules to this and stir till the granules dissolve. Let it sit for 5-10 mins till bubbles show on the top.

IMG_6115


2. Take the flour in a mixing bowl. Add salt, 2 tbsp of olive oil and mix well.

IMG_6123


3. Next add the yeast water and start mixing with hand or a spoon till the dough becomes sticky and tight.

IMG_6127


4. Knead well  with your palm to form a smooth dough. Add more water or flour as required while kneading and shape the dough into a ball .

IMG_6134


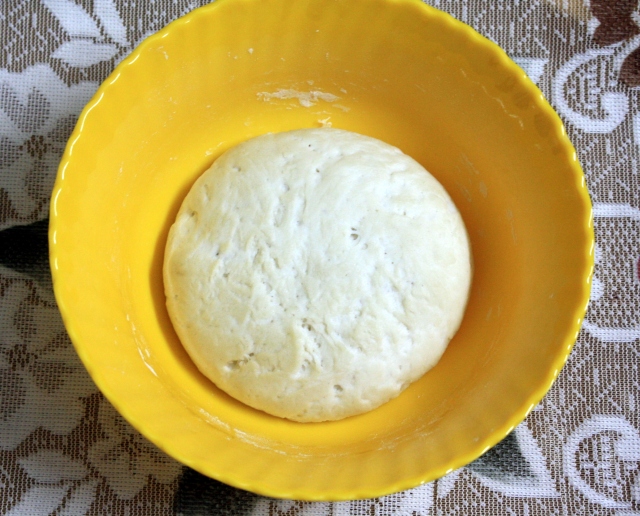
5. Coat with a layer of olive oil and keep it closed for 2 – 2 ½ hours.

IMG_6135


6. After 2 hours, the dough would have nicely risen up. Punch  it down with your fist to get rid of all the air.

IMG_6139


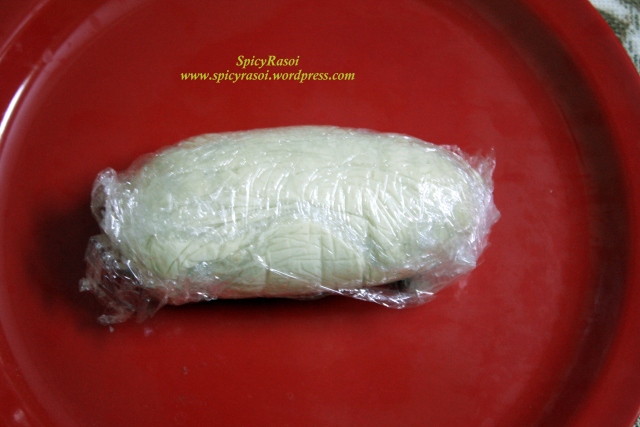
7. If you are planning to make the pizza the next day, at this stage you can wrap it tightly with a plastic wrap and store in the fridge. Defrost to room temperature for about 30-40 minutes before making the pizza.IMG_6143


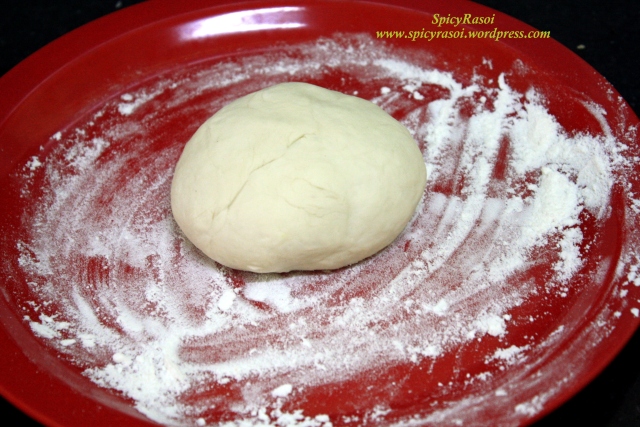
8. Knead the dough with your hands for 5 mins. The dough will be nice and elastic now. On a clean slab or plate, sprinkle some flour and place the dough in the centre.

IMG_6146


9. Spread the dough with your hands in the desired shape to make the pizza base. Make sure the base is about not very thick as it becomes double after baking.  You can use a rolling pin if needed. 

IMG_6147

10. Turn on the oven. Preheat to 200 degrees C with both the grills on.

Method of baking the pizza: 

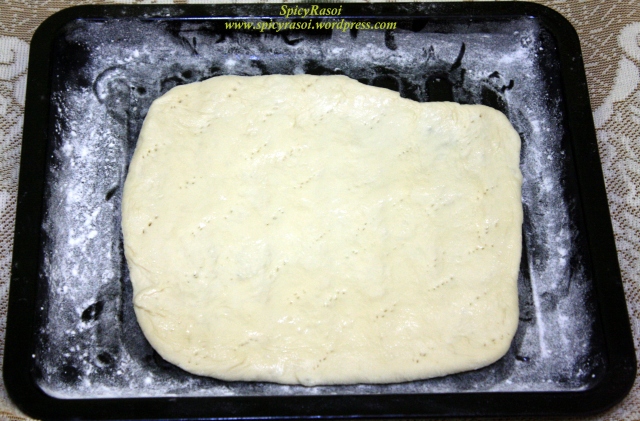
1. Grease an oven tray with olive oil. Sprinkle a thin layer of flour.

2. Transfer the pizza base onto the tray.

3. Prick few holes with a fork on the base so that the base cooks evenly. Brush a thin layer of olive oil on the top.

IMG_6149


4. Then, spread a layer of pizza sauce.

IMG_6150


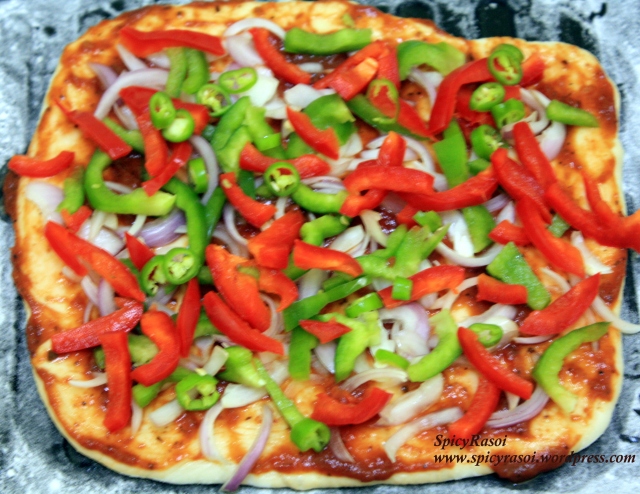
5. Next add all the toppings in this sequence – onions, capsicum, tomato and green chilli .

IMG_6154


6. Grate the cheese and spread on the top. Sprinkle herbs like basil or parsley if available.

IMG_6174


7. The oven must be ready for baking by now. Place the tray in the oven. Bake at 200 degrees C for 10- 18 mins  based on your oven capacity.

IMG_6184


8. Once the cheese and base turn slightly brown, take out the tray from the oven.

IMG_6190

9. Transfer the pizza on to a clean plate and cut into slices. Sprinkle oregano and chili-flakes on top and serve it hot!!IMG_6199


Cooking Tips:

  • Slice all vegetables thin and long so that it’s easier to bake. Remove  the liquid portion from tomato as it causes the base to become soggy.
  • You can even saute` the vegetables slightly  in olive oil before adding to the pizza.
  • Whole wheat dough takes more time to rise than regular flour (maida).
  • If you want the dough to rise quickly, keep the container in a plate filled with hot water  for 1 hour.